

Documentation
Quick start: from download to your first report
This guide takes a new customer from the download to a first report. Plan for about 10 minutes of your own time, plus a few minutes of waiting while the installer and the first computer run.
Before you start
You need:
- A Windows computer for the server, signed in as a local administrator, that is on whenever you want monitoring. Windows Server 2022 or 2025, or Windows 10 or 11 Pro, 64-bit. Tested configuration: Windows Server 2025 Standard with 4 logical processors, 4 GB of memory and a 64 GB disk; use at least that. (YuviRed has not published a formal minimum; see the Installation guide for what the lab measured.)
- A second Windows computer (Windows 10, 11 or Server) to add as the first monitored computer.
- A work email address (a free email address is refused for a Lite download) and a company name.
- A modern browser (Chrome or Edge) on the server.
- Internet access from the server to https://activate.yuvired.com on port 443, once to activate and once a day afterwards. With no internet on the server, use the license file route in step 4.
- Permission from your organization to monitor the computers you add.
Example data in this guide: company "Northwind Dental", administrator a.rivera, server address 192.0.2.10. Use your own.
Step 1. Download and verify
- Go to https://yuvired.com/download and enter your work email address and company name. You receive the email "Your YuviRed verification code" from YuviRed.
- Enter the 6-digit code from that email on the page within 30 minutes. The page then gives you the download and your activation code; the email "Your YuviRed Lite activation code" repeats both. Keep the activation code: you use it in step 4. It works for 7 days and activates one server.
- Download
YuviRed-Lite.exeand copy it to the server. Check the signature. In File Explorer, right-click the file, choose Properties, open the Digital Signatures tab, select the signature, choose Details. It must say "This digital signature is OK" and the signer must be YuviRed LLC. Or, in PowerShell, in the folder:
Get-AuthenticodeSignature .\YuviRed-Lite.exe | Format-List Status, SignerCertificate
signtool verify /pa .\YuviRed-Lite.exe
Check the SHA-256 against the value shown on the download page (written here as
<published SHA-256>; it is never in this guide):(Get-FileHash .\YuviRed-Lite.exe -Algorithm SHA256).Hash -eq '<published SHA-256>'
You should see: Status Valid, signer YuviRed LLC, and True from the hash check. If any of
these is wrong, do not run the file: delete it and download it again.
Step 2. Install
- Double-click
YuviRed-Lite.exe. The window is titled YuviRed Lite Installer with the heading License Agreement. - Read the agreement. Tick I have read and agree to the YuviRed License Agreement. The Install button stays off until you do. Choose Install.
- At the Windows prompt (User Account Control), choose Yes. It names the publisher YuviRed LLC.
- The window Installing YuviRed Lite shows a progress bar and a checklist: Preparing installation, Installing YuviRed, Configuring database, Starting services, Securing installation, Verifying YuviRed. Wait. It takes a few minutes.
- The window Installation Complete says "YuviRed Lite installed successfully", with Service: Running and Status: YuviRed Ready, and a note that starts "Documentation: https://yuvired.com/docs." Choose Open YuviRed.
You should see: the Installation Complete window. If instead you see Installation Failed, it shows a Support code and a Log file path, with a Close button: see Installation.
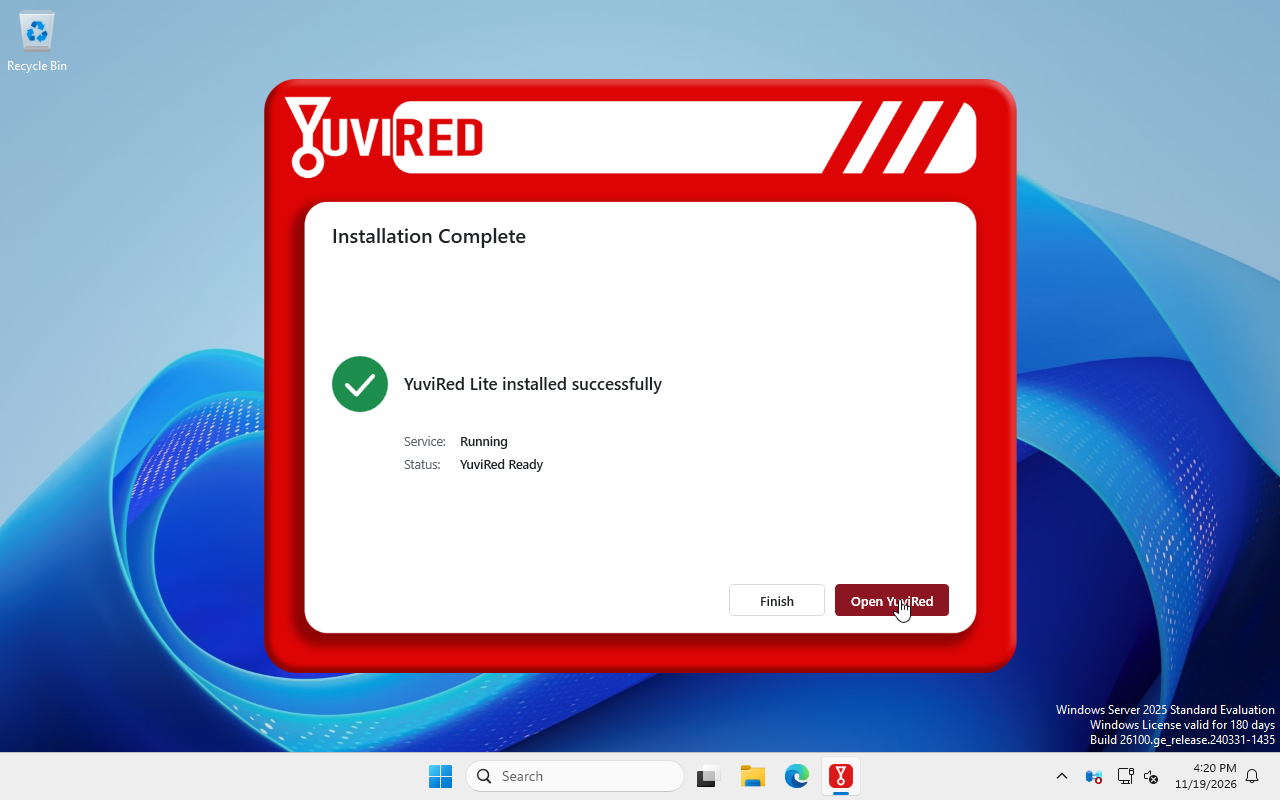
The installer's last page. The service shows Running and the status shows YuviRed Ready; the Finish and Open YuviRed buttons are at the bottom. The Windows evaluation watermark is part of the lab capture.
Step 3. First-time setup
- Your browser opens https://127.0.0.1:8443 and warns that the connection is not private. This is expected: the server made its own certificate. Choose Advanced, then **Continue to 127.0.0.1 (unsafe)** (Chrome: Proceed to 127.0.0.1 (unsafe)). The address is this server itself, so the warning is safe to pass here.
- The page Welcome to YuviRed asks you to Create your administrator account. Fill in **Full Name** (a.rivera), Email, Password and Confirm Password. The password needs at least 12 characters using at least 3 of: lowercase letters, capital letters, numbers and symbols. Check the email address before you continue: this account becomes the owner, the only account that can manage the license, and the console cannot change an account's email later.
- Tick the box that starts "I accept the YuviRed End User License Agreement (version 1.0) and I have read the Monitoring and Data Notice" (both are links). Choose Create Account.
- Because the owner role requires multifactor authentication (MFA; the screen calls it two-factor authentication), the next step asks you to scan a QR code with an authenticator app on your phone (any app that makes 6-digit time-based codes). Type the app's 6-digit code into **Code from your app** and choose Enable & Sign In. You have 2 minutes from choosing Create Account.
- YuviRed shows your 10 recovery codes exactly once. Choose Download .txt or Copy, store them somewhere you can reach without your phone, tick "I have saved these recovery codes somewhere I can reach without this device. They cannot be shown again." and choose Continue.
You should see: the console dashboard, with an amber banner: "This YuviRed server is not activated. You have 6 days left to activate it. After that, the console is unavailable until it is activated." and the button Activate now.
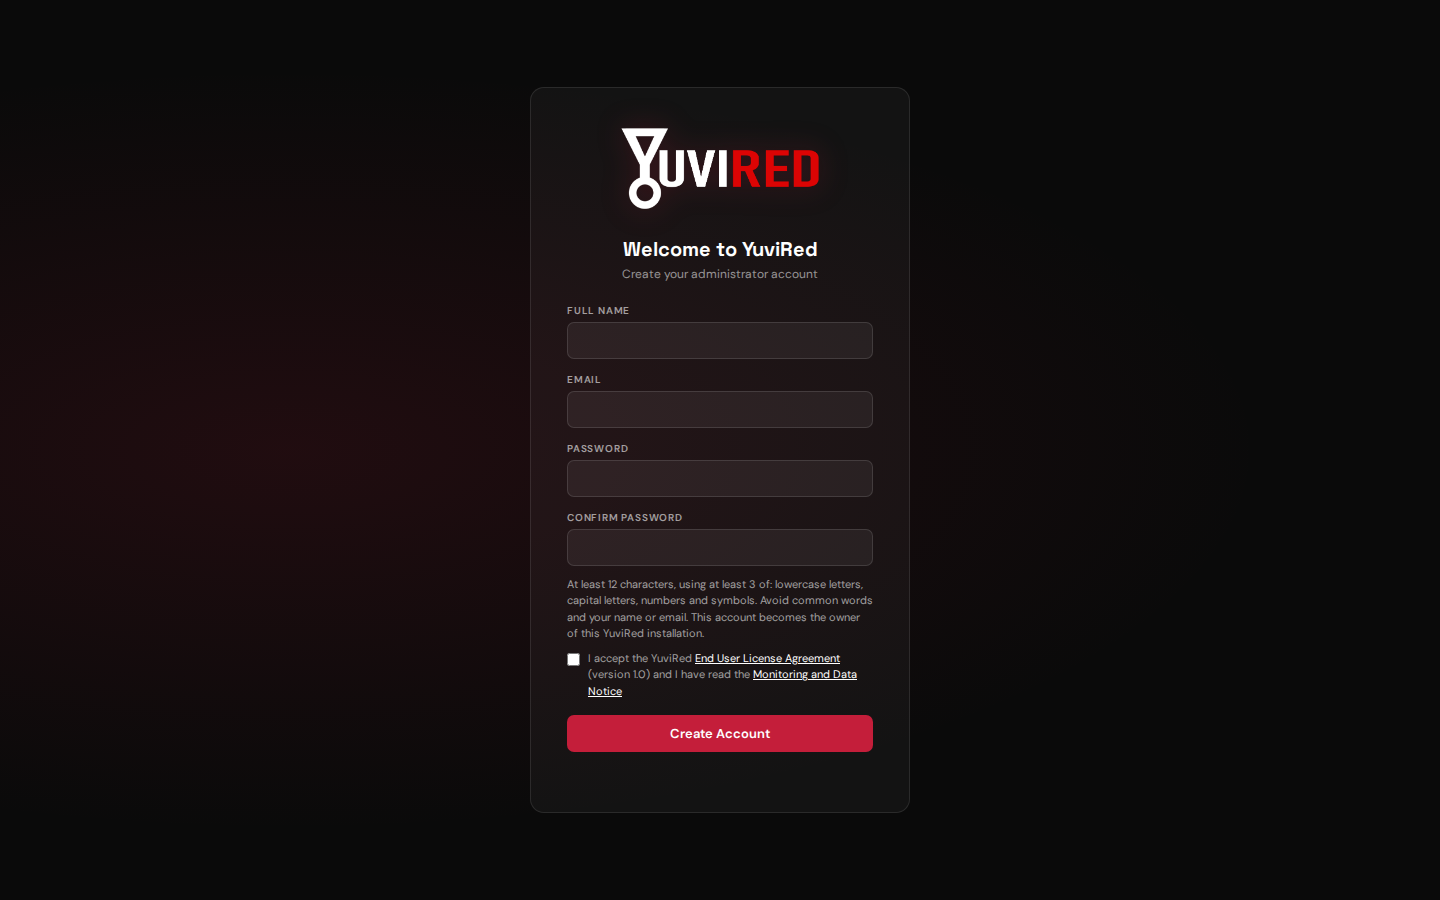
The first-run setup form. Fill in the four fields, tick the acceptance box, then choose Create Account.
Step 4. Activate
Do this signed in as the owner account you just created; no other account can activate.
- In the amber banner, choose Activate now. (Or open Configuration, find the License panel, choose Activate or import license.) The screen Activate YuviRed opens.
- Under Activation code, type the code from step 1 and choose Activate.
- No internet on the server? On a computer with internet, open the license file link in your YuviRed email (https://activate.yuvired.com/license-file), enter the activation code and the Installation ID from this screen, and choose Download license file. Back on the server choose Upload license file and pick it.
You should see: the toast License activated, and the License panel showing Active, YuviRed Lite, Expires Never and "YuviRed Lite is free and never expires." If a message appears instead, see Licensing.
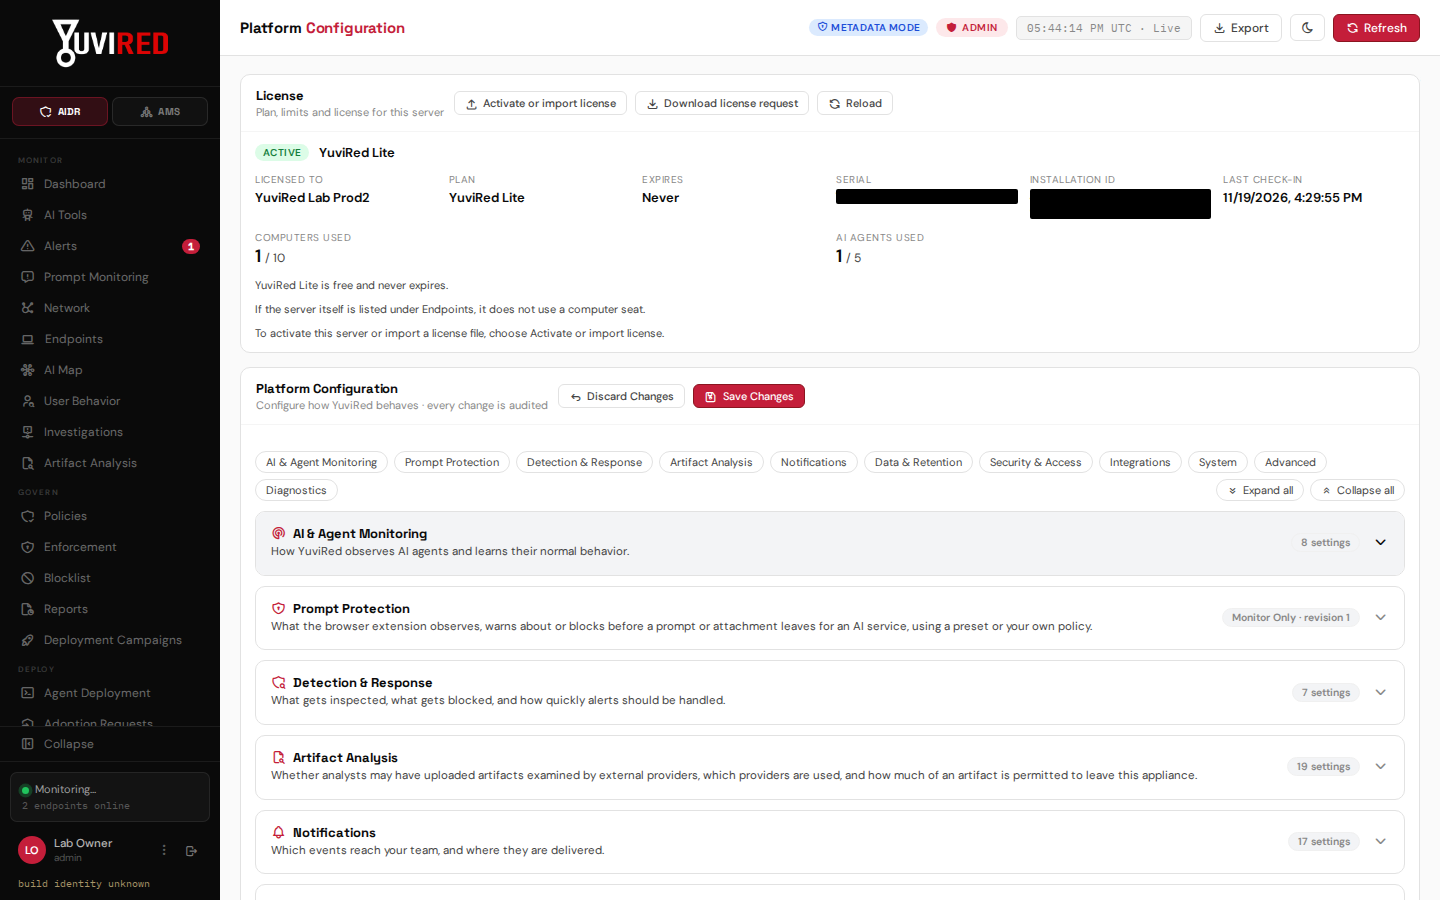
The License panel after activation. Notice the plan, the Active state, and how many of your 10 computers and 5 AI agents are in use. Serial and installation ID are covered.
Step 5. Let other computers reach the server
A new server starts in loopback mode: it listens on 127.0.0.1:8443 only, so only a browser on the server itself reaches the console, and no other computer can enroll. Before you add a computer, switch network mode on.
On the server, open PowerShell as administrator and run (use your server's DNS name or fixed IP address; a DNS name survives an address change):
$py = "C:\Program Files\YuviRed\runtime\python.exe"; $yr = "C:\Program Files\YuviRed\runtime\yuvired_service.py" & $py $yr network --name 192.0.2.10- Keep the window open. The command writes
config\network.conf, adds the inbound Windows Firewall rule YuviRed Server (TCP 8443) for the Domain and Private profiles only, and restarts YuviRed: it prints "Restarting YuviRed. Keep this window open: this usually takes a minute or two and can take up to 7 minutes." The server's own agent is skipped in network mode. - Read the output. If it says "This server's network is set to Public, so Windows Firewall blocks
port 8443 and no other computer can connect. YuviRed does not open the Public profile. ...", follow
the instructions it prints (set only the trusted network to Private with
Set-NetConnectionProfile), because computers cannot connect until you do. - Check it:
& $py $yr network --statusshows the bind, the firewall profile and rule, the server state and a line "certificate SHA-256: ..." (& $py $yr network --offreturns to loopback and removes the rule.)
You should see: the command ends with exit code 0 and --status shows the server bound to the
network with the rule present. From now on the console address is https://192.0.2.10:8443 (or
https://<name>:8443), and other computers' browsers can reach it.
Step 6. Add the first computer
- Reload the console, at https://192.0.2.10:8443 if you like (the browser warns about the
certificate once more for the new address). Open Agent Deployment. The Add Computer panel
shows the server address and "Computers: 0 of 10". Leave "Computers this download may enroll" at 1
and choose Download installer. Your browser saves
YuviRed-Add-Computer.zip. - Copy the zip to the other computer. Treat it as a secret: it works for 24 hours and is a key to
your server. Open
README.txtinside it and follow its four steps in PowerShell as administrator (make the protected folderC:\ProgramData\YuviRed-Install, unzip into it, runInstall-YuviRed-Agent.cmd). Do not run the MSI by itself and do not run from Downloads. - Wait until the installer finishes (up to 90 seconds for the server's answer).
You should see: "Configured. This computer is enrolled and reports to https://..." and "Done. Check that this computer is listed under Endpoints on the server." In the console, open Endpoints: the computer is listed within a few minutes, and Add Computer shows "Computers: 1 of 10". When you are done, delete the zip everywhere.
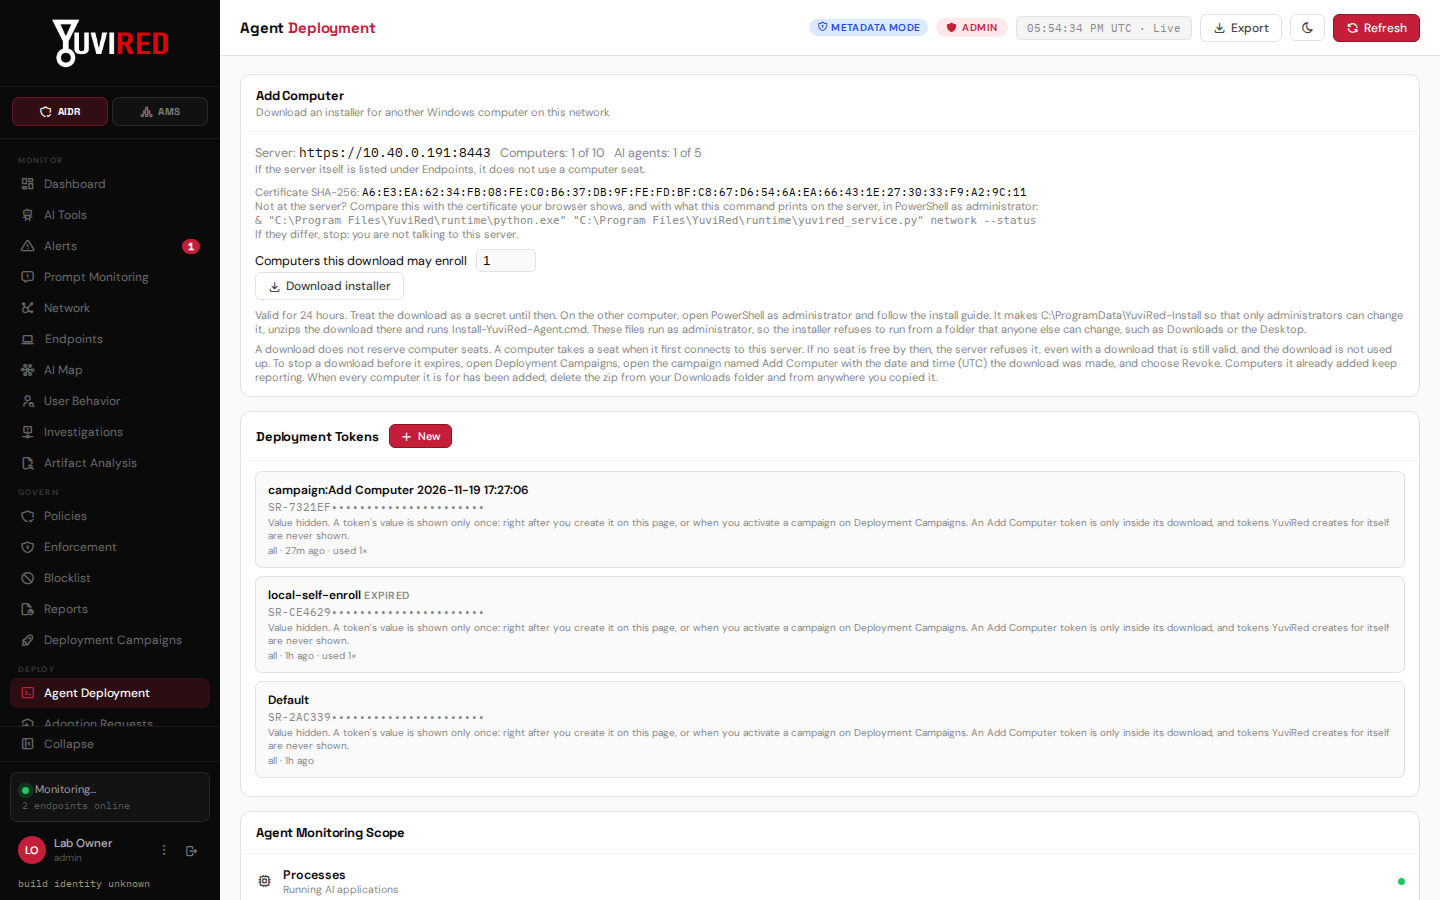
The Add Computer page. The Download installer button is at the top; check the computer count box before you download.
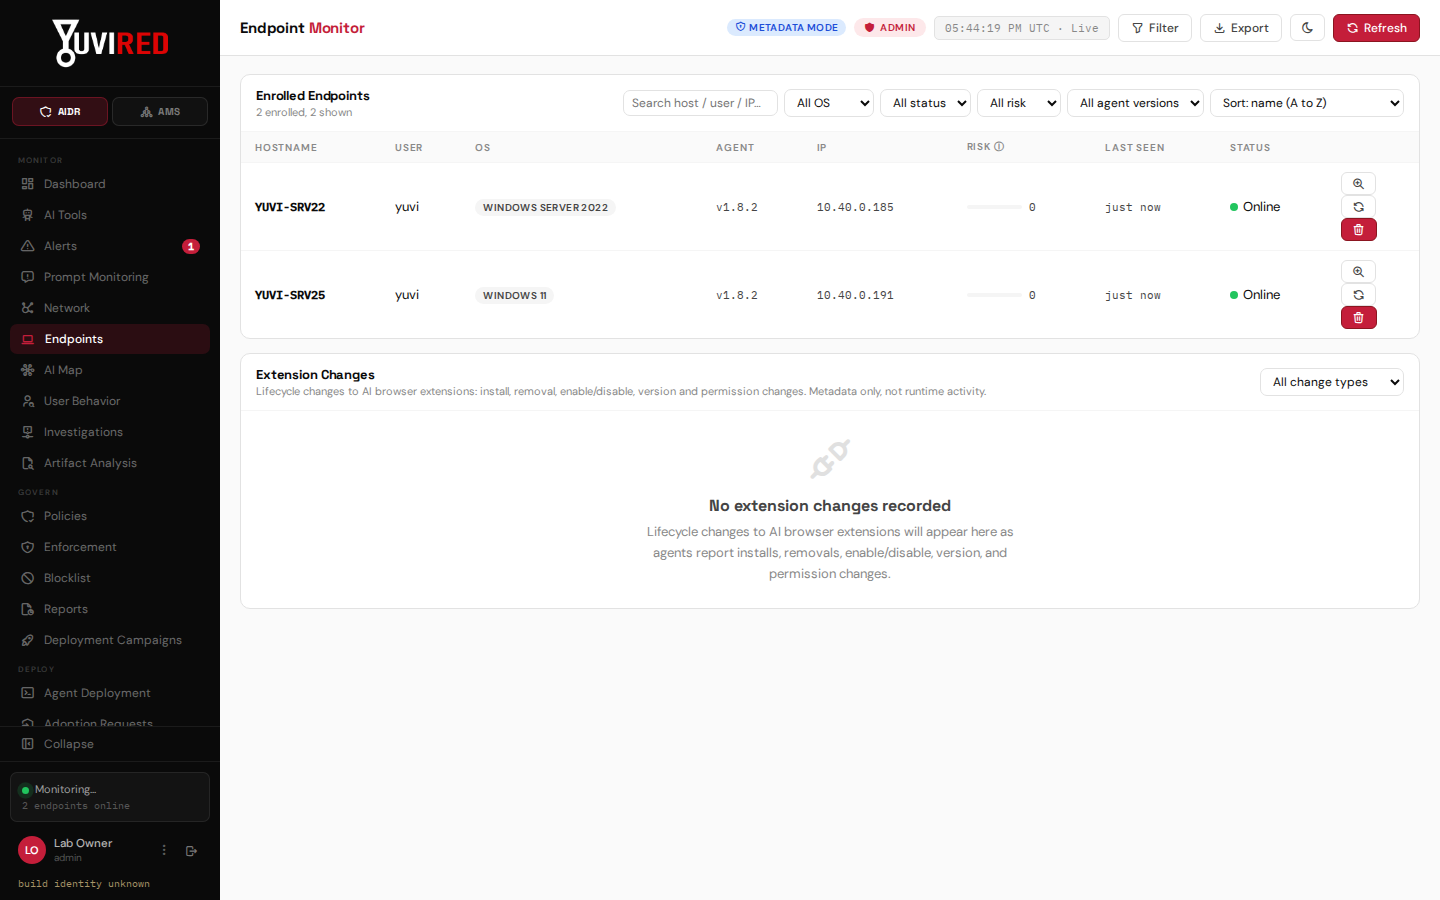
The Endpoints page with enrolled computers online. Both are lab computers.
Step 7. Generate your first report
- Open Reports. On the Reports tab choose Executive Summary (about 2 to 4 pages).
- Pick a period that covers today, then choose Generate Executive Summary (PDF).
- The report appears under Report history, with its number, period and files. Download it.
You should see: a report in Report history with status Done. A brand-new computer has little data yet: the report improves as the computer runs for a few hours or days. The Live overview tab shows the current picture at any time.
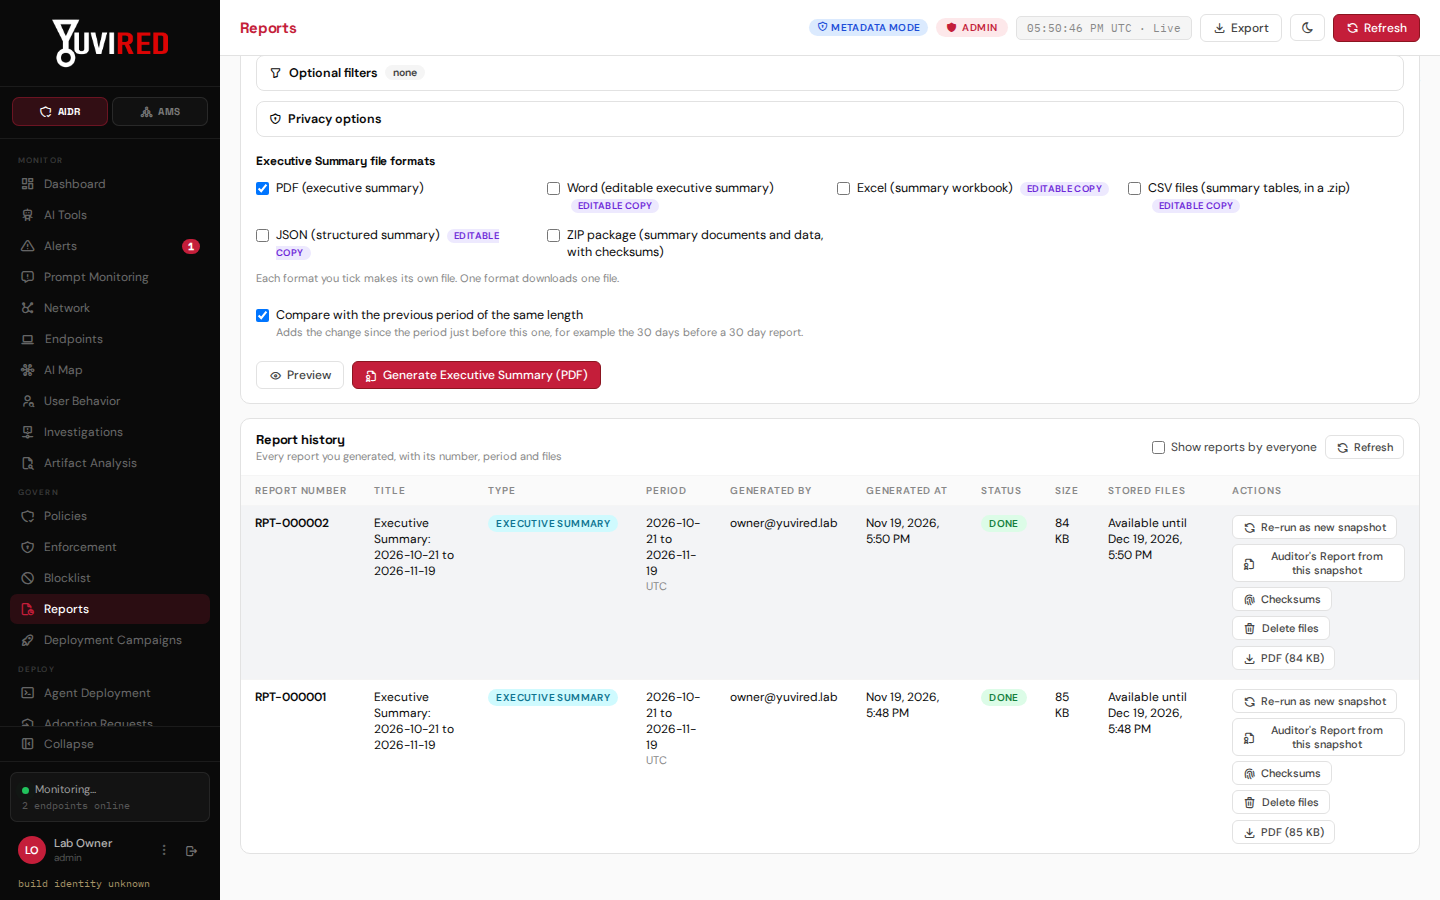
The report history. A finished report shows status Done, with buttons to download it as a PDF.
What next
- Finish setup: more administrators, retention and notifications, the organization name on the employee notice: Setup.
- Tell the people on the monitored computers. The notice is on the console's Legal page.
- Know your license rules and what to do before day 7: Licensing.
- Without internet, the console's Help page carries an offline copy of the essential pages of this documentation.